Okta
Team O'clock supports SAML 2.0 Single Sign On on paid plans.
This is a step-by-step guide on how to set this up using Okta.
Step 1: Create the Okta app
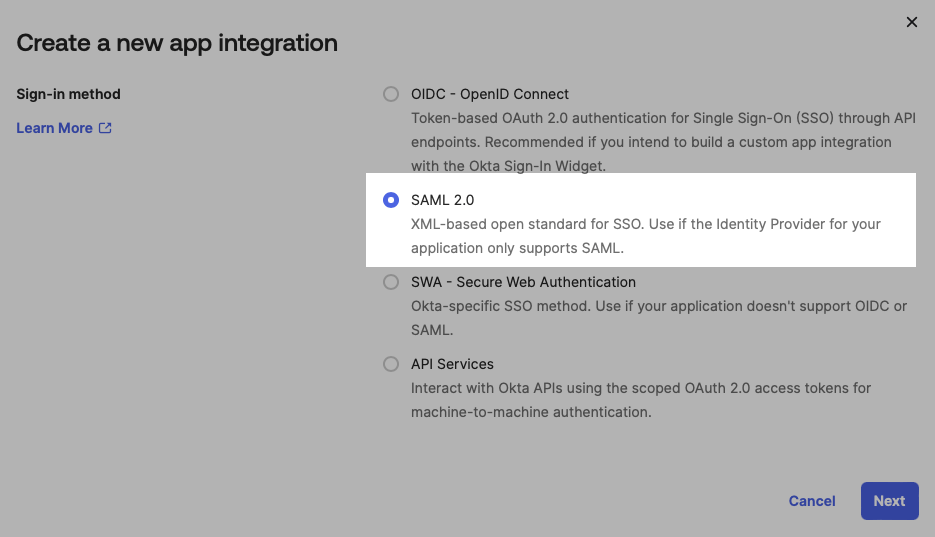
In your Okta admin interface create a new SAML 2.0 application.

On the Configure SAML step, set the following values.
Single sign-on URL: https://www.teamoclock.com/auth/saml/YOUR-ORGANIZATION-SLUG/callback
Audience URI (SP Entity ID): https://www.teamoclock.com/auth/saml/YOUR-ORGANIZATION-SLUG/callback
Name ID format: EmailAddress
Attribute Statements (optional):
Name | Name format | Value |
Basic | user.email | |
first_name | Basic | user.firstName |
last_name | Basic | user.lastName |
Step 2: Retrieve Sign On settings
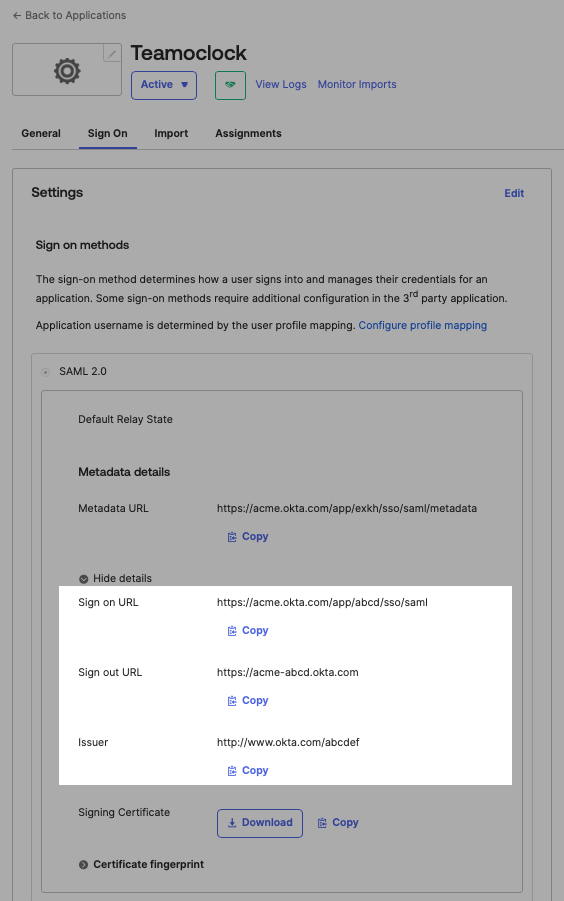
After the Okta app is created, go to Sign On tab and locate the following information:
Sign on URL
Issuer

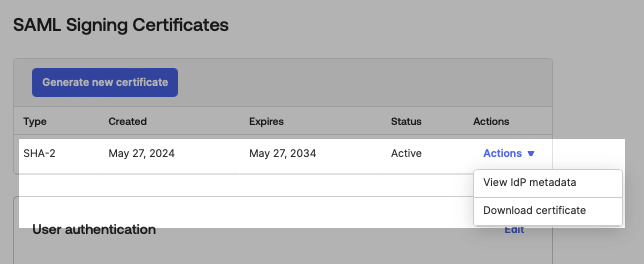
Next, download the SHA-2 certificate from the SAML Signing Certificates section.

Step 3: Contact Team O'clock support
Send the Sign On URL, Issuer, and the downloaded certificate to the Team O'clock team, to enable Okta on your account.
Additional configuration options
The following options are available for configuration by the support team:
Enforce SSO: To force all organization users to authenticate via SAML.
Auto approve: To allow your Okta authenticated users to automatically join your organization with the "member" role.
Session timeout: To configure session expiration timeout, other than the platform default.
Login with Single Sign-On
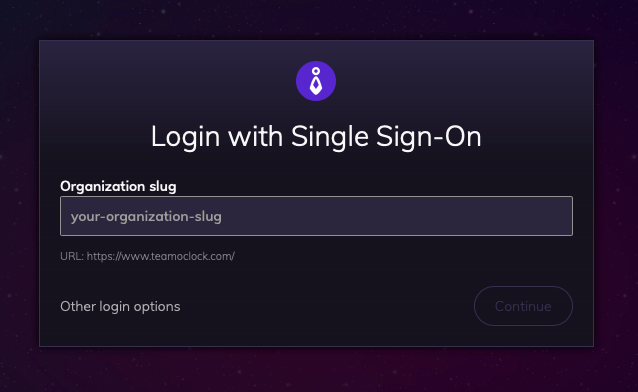
After the integration is in place, users can log in by selecting the Sign in with Single Sign-on (SSO) option on the login page.
Then, they should specify the organization slug of their organization, as shown in the image below.

They will be redirected for authentication at Okta, to complete the authentication process.