Creating a Custom Retrospective Activity
The retrospective board offers many customisation options for the meeting facilitator to create a custom activity. Creating a custom activity helps keeping the team engaged by presenting them something different. Additionally, a custom activity can serve very specific needs of a retrospective.
With Team O'clock you can customise:
Columns, adding, removing and repositioning columns as well as naming them and adding descriptions.
Retrospective actions, for maximum votes and anonymity both on notes and voting.
Customize a retrospective activity
To customise a retrospective activity you should trigger a retrospective meeting and then visit the created meeting link. As long as you haven't click the button Start at the top right side you will be able to customise the activity.
⚠️ Customizing columns are available on Standard and Enterprise plans only.
Kick start your customisation by choosing an appropriate existing activity to start from. To do that click on the Activity presets link in the Activity template step of the Retrospective setup.
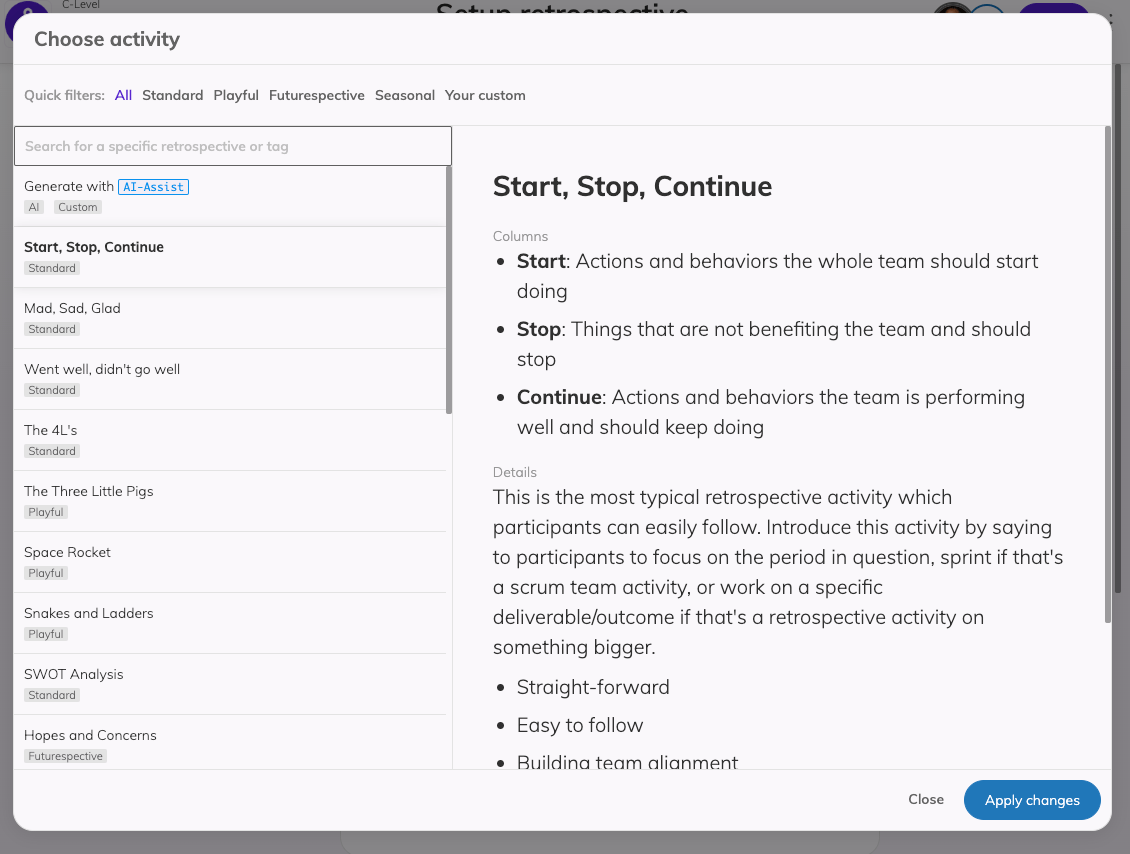
In case you have any previously created custom activities they will be available in the activity list.
Managing columns
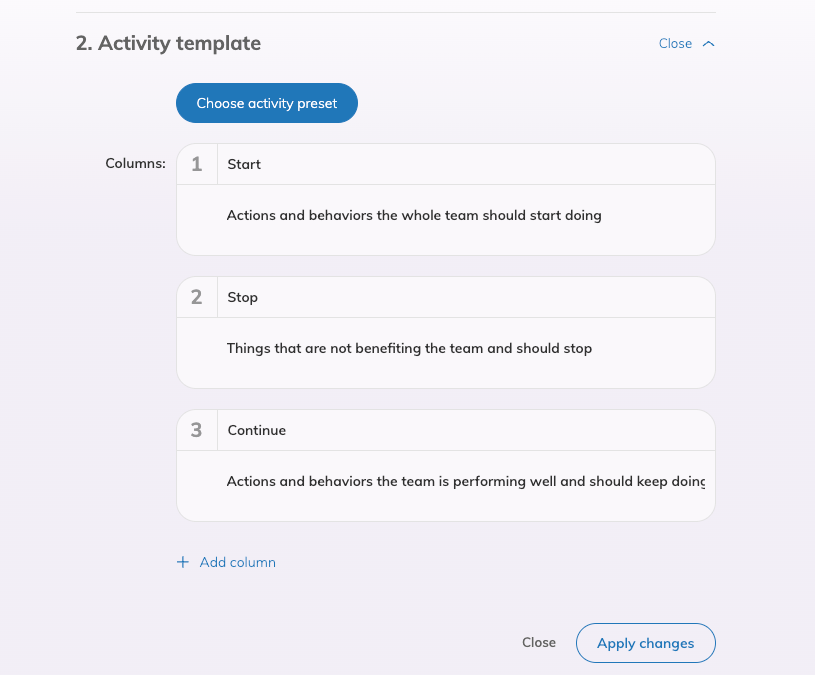
If you can customise the retrospective and while the retrospective is not started yet, click to edit the second setup step called Activity template. In this setup step, you can manually edit the columns of your retrospective activity.
To edit a column's name or description simply click the respecting text and edit it.
Each column card has a number, representing that column's position from the left of the screen. So column numbered 1 is placed on the left side of the screen, column numbered 2 is placed directly on the right of column 1, etc.
To move a column to a different position, hover your mouse over the column of interest and use the arrows displayed on the bottom left of the column card to reposition.
To delete a column, hover your mouse over the column you want to delete and use the Delete option located on the bottom right of the column card.
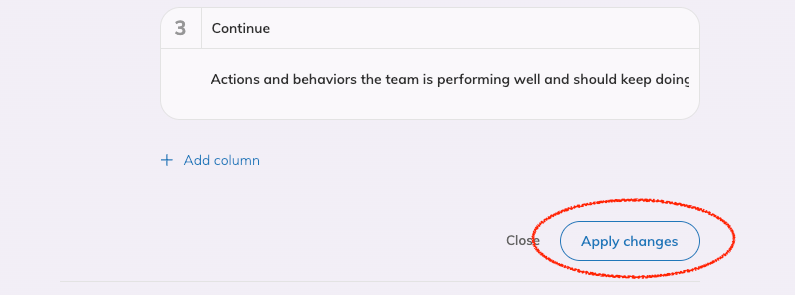
To apply the changes done on the Activity template step, click the Apply changes button.
When you are done setting up your retrospective you can proceed by clicking Start on the top right corner of the header.