The Agenda Meeting
In Team O'clock, you can perform any meeting using the agenda meeting. This is a very powerful meeting type based on topics, that you can perform asynchronously, synchronously, or in a hybrid mode.
Starting an agenda meeting
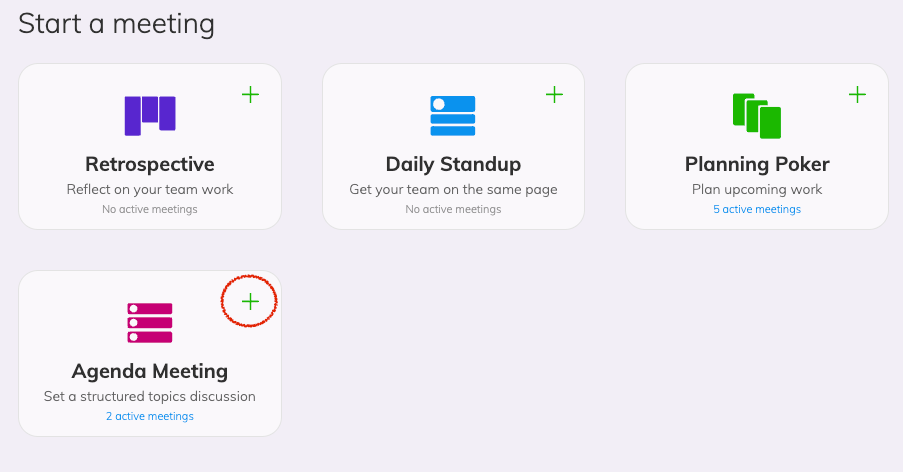
To start an agenda meeting, visit your Team O'clock dashboard page and click on the Agenda Meeting card or the '+' icon on the Agenda Meeting card.
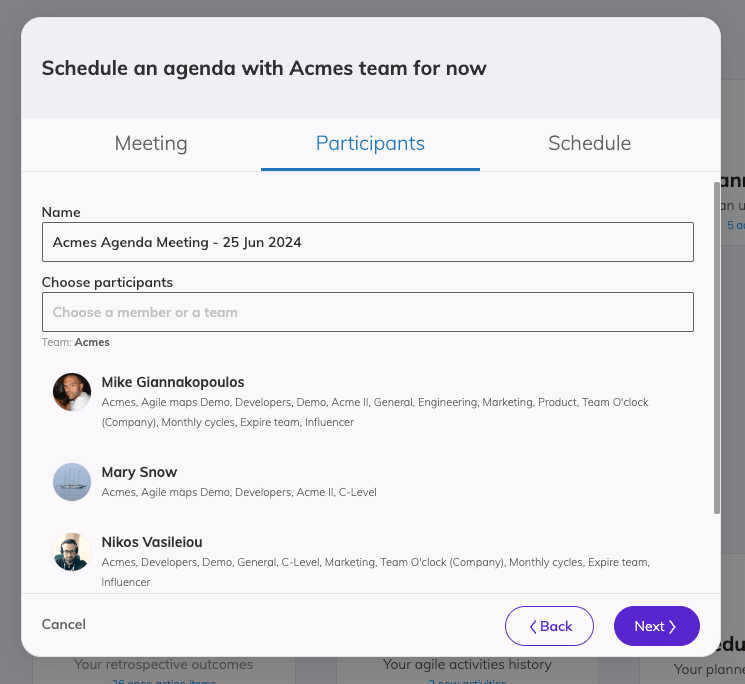
A popup will open where you choose the participants of the agenda meeting. Typing in the participants' input you will get suggestions for teams as well as members to add in the participants list.
When choosing a team, all team members are added as participants.
Once you have set up the participants, click the Next button.
In the next screen choose whether you want to:
Create a Draft agenda meeting, that you can set up before all participants can join and contribute.
Start the agenda meeting now, where all team members will be notified via email about the meeting and you will have the meeting URL to join instantly.
Set up a weekly recurring agenda meeting, where the team will be notified via emails on each of the selected days for the recurring agenda meeting and a few minutes before the meeting starts. Read here to learn more about scheduling a meeting.
Your meeting will be created once you click the Finish button. In the case, you have selected to start a meeting you will see the following screen, informing you that all participants are notified via email.
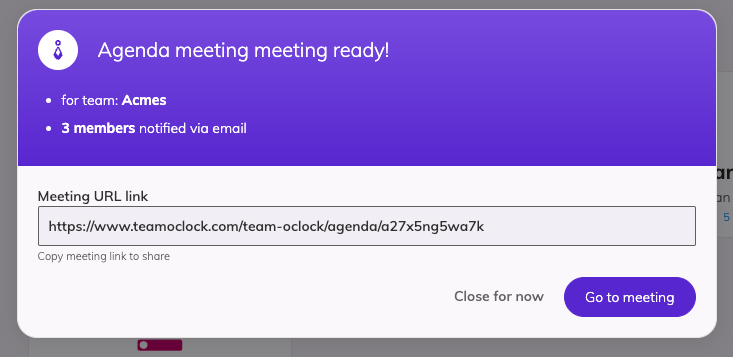
To join the meeting you can click the Go to meeting button.
The Agenda meeting page
The meeting page layout supports both synchronous and asynchronous estimation sessions.
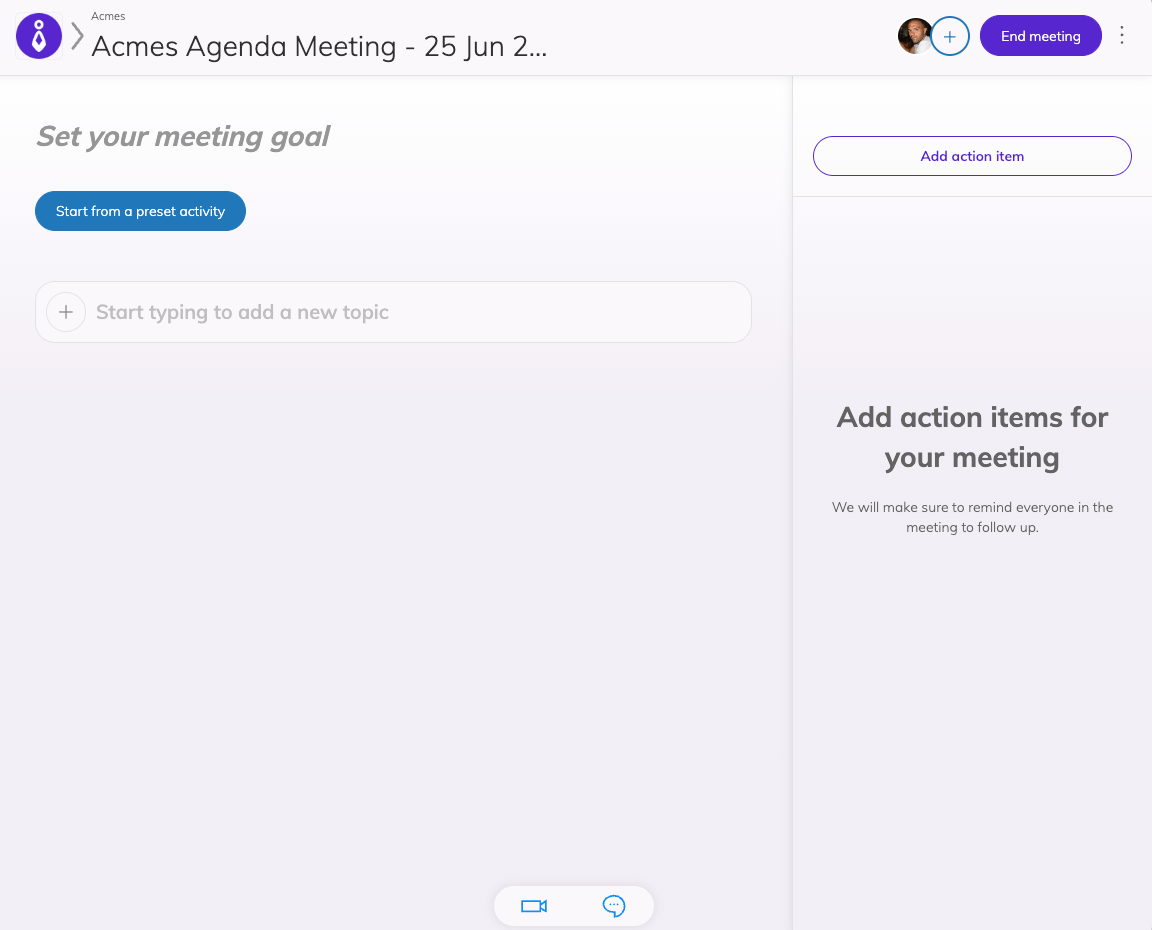
When you visit the page you will see a header displaying the meeting type, a list of team members that are currently in the meeting on the right with a button to invite more members, the End meeting button, and a three dots menu.
The main area of the page is divided into two sections:
The Meeting goal and topics area, on the left for setting a specific goal for the meeting and start populating with topics
The Action items area is to add and view any action items the team decided during the meeting.
To keep the agenda meeting flexible, all participants can add topics and edit the meeting goal. This flexibility is important, especially for asynchronous meetings where relevant topics might come up after an async discussion.
At the bottom of the page is a footer with options for joining a video call with your team members to discuss the meeting and a team chat, where you can exchange messages.
Visiting an agenda meeting for the first time, both areas will be empty.
Setting up your agenda meeting
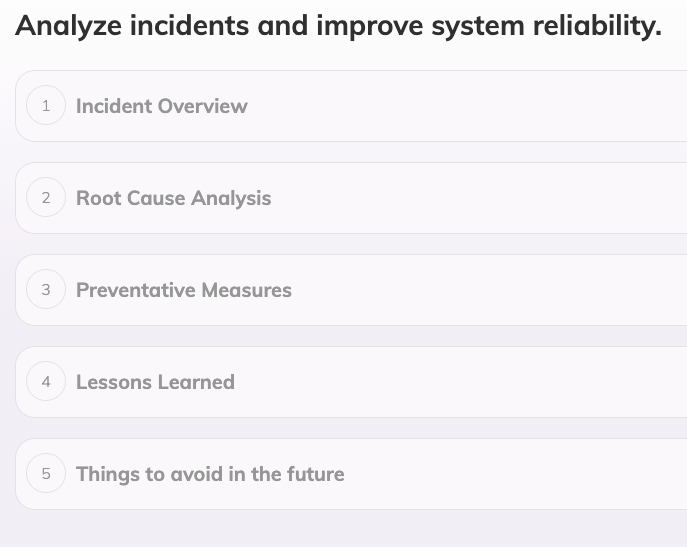
To set the stage for a successful meeting you will need to define:
A meeting goal, that defines the purpose and scope of the meeting, aligning all participants and topics around this goal.
Relevant topics, that will assist in achieving the set goal.
Setting a meeting goal
To set a meeting goal, click on "Set your meeting goal" and type your meeting goal.

You can change the meeting goal at any time, to cover any emerging directions from the discussion. Depending on the meeting you are having this might be needed (e.g. a brainstorming session that goes too specific on a theme) or must be avoided (e.g. a discussion around HR improvements for the upcoming quarter). It is at the discretion of participants to safeguard or update the meeting goal to reflect the specific needs.
Managing meeting topics
There is always a visible input area for adding new topics, right below the meeting goal - if no other topics are available -, or at the very bottom of the existing topics.

To add a topic, simply click on the specific area and start typing your topic. When you're done typing your topic title press Space or click the "+" button on the left of the add topic area to add this topic at the bottom of the topics list.
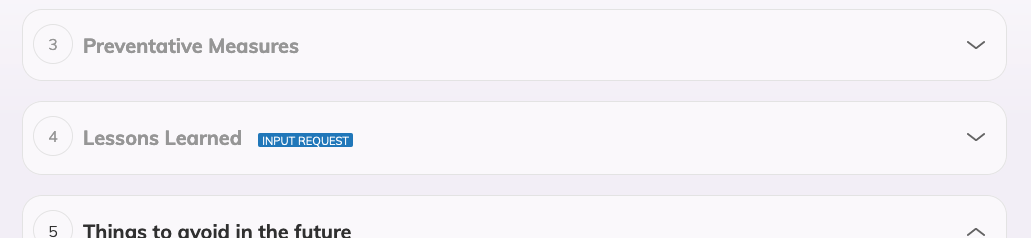
Each topic is added to a separate topic card, displaying a number on the left of it. This number represents the expected discussion order for each topic. To change the order of a topic, simply click and drag that topic into its right position.
You can edit the topic title by hovering your mouse over the topic card and clicking the Edit option on the right.

To remove a topic, Edit the topic title, delete all the text, and press Enter.
Please keep each topic title short and to the point for easy scanning from all participants. To add more context to a topic, click anywhere on the topic card to expand it and edit the description of the topic, visible right below the topic title.
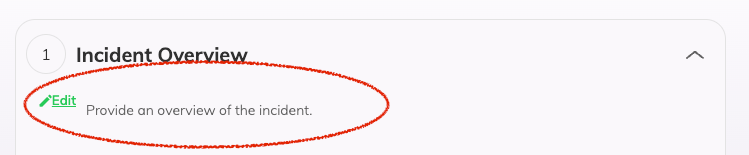
Extend with more context on the topic in the description. The description field supports markdown to give a better structure to your context. Add any external documents needed as links in the description.
Running an agenda meeting
With your meeting goal and topics set, you and the team can start the discussion.
To support all possible ways to run a meeting - async, sync, or hybrid - the Agenda Meeting offers notes for each topic. Sharing a note with important information on a topic ensures that all participants can see this information.
Using topic notes
To add a note on a topic, expand the topic card and click next to the "+" button. Notes support markdown, allowing for bigger statements and structured representation of a thought.
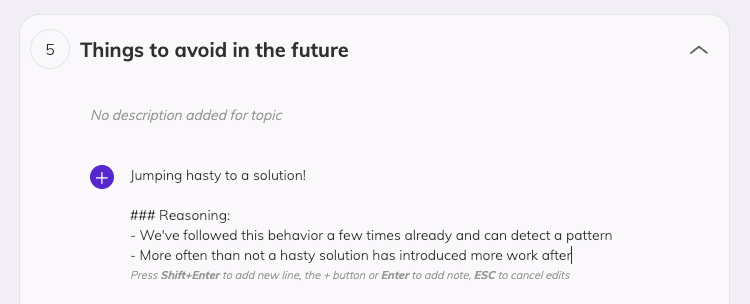
To add the note press Enter, or click the "+" button on the left of your note.

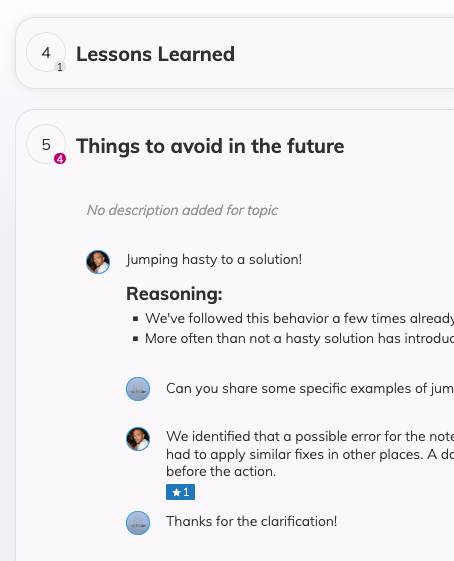
For each note added to a topic all participants can see the avatar of the member that added the note and the date this note was added by hovering on the note. Additionally, all participants have options to:
Add a Star to a note, to signify that they agree with the shared note.
Reply to a note, to continue a discussion on a specific note under a thread
Add a note in a thread, to continue a discussion that's happening in a thread.
Any reply notes added to a specific note, form a thread under the parent note.

The member who added a note or a reply can edit that note by clicking on the Edit option visible when hovering over that note.
To delete one of your notes, Edit the note of interest, clear all the text and press Enter.
Expanding or hovering over a topic with notes you can see the total number of notes added on that topic.
Managing a topic discussion
To manage a focused discussion and resolution of a topic, the Agenda Meeting offers a set of tools. With the tools offered, you can perform both a synchronous, asynchronous, or hybrid meeting.
Request team input
Request team input, is a way to signal all participants on the Agenda Meeting page that a specific topic is of interest. Regardless of when participants join the Agenda Meeting, they will see an INPUT REQUEST badge next to the topic of interest.
To request team input on a topic, expand the topic card and click the Request team input button. The button will stay active for as long as the specific topic has the INPUT REQUEST on.
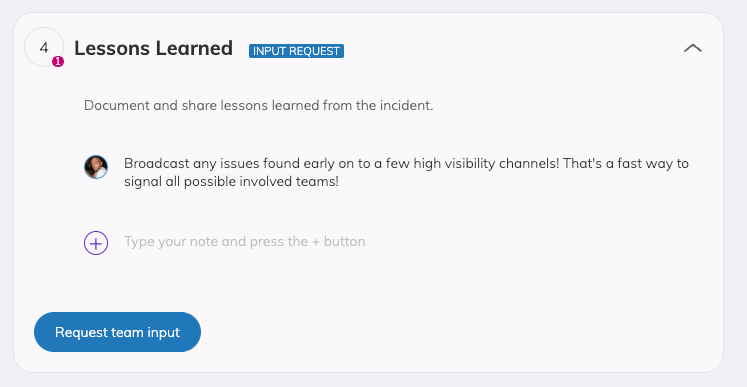
Only one topic at a time can hold the badge for INPUT REQUEST, keeping participants focused on a single item. Clicking the Request team input button on a different topic will automatically switch the INPUT REQUEST badge to the current topic
To remove an active INPUT REQUEST, click the Request team input button again.
Set a topic timer
You can use the set timer option to timebox the discussion on a specific topic. The set timer option acts as an indicator of the expected time to spend on the topic.
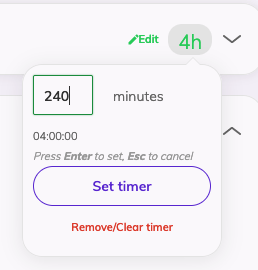
To set a timer for a topic, hover over the topic card and click on the timer button visible on the right of the title, right before the expand|contract icon.
Clicking the button you will see a dropdown with a timer input to set the exact minutes for the topic.
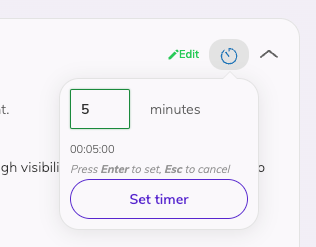
When you are done setting the timer either press Enter or click the Set timer button to add the timer to the topic.
A topic with a timer will display the remaining timer to all participants entering the Agenda Meeting page. Hovering over the timer displayed, you can see the exact remaining time.

ℹ️ In case of an async meeting, use this setting and add more than 1440 minutes (which is a full day). Here are some helping values:
1 day, 1440 minutes
1,5 days, 2160 minutes
2 days, 2880 minutes
3 days, 4320 minutes
To remove a set timer for a topic, click on the timer to view the dropdown and click the Remove/Clear timer option.
Complete a topic
To signal that a topic is fully covered, you can mark a topic as Complete. A completed topic has a checkmark icon and its title is displayed in strike-through in the topic card.

To mark a topic as completed, expand the topic card and hover over that card to see and click the Complete topic option at the bottom left of the card.
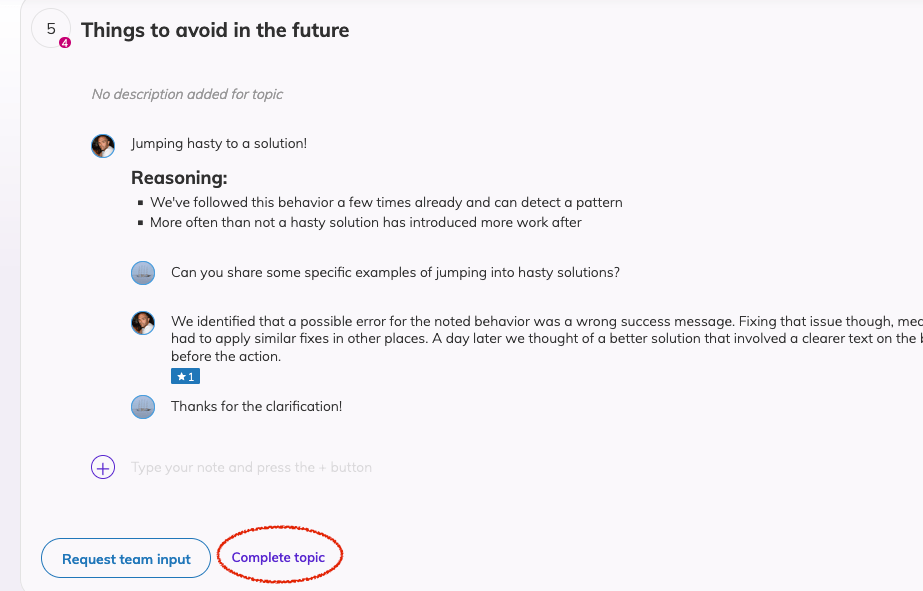
Topics that are marked as completed, block the addition of more notes to keep the meeting moving forward.
To reopen a complete topic, expand the card and click the Open topic that replaced the Complete topic option at the bottom left corner.
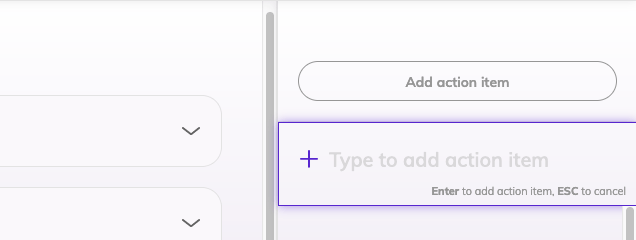
Using action items
At any point during the meeting, you can add action items. To do that click the Add action item button at the top of the right side of the screen.
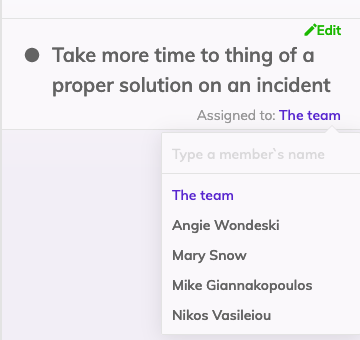
You can also assign a participant as responsible for carrying out a specific action item. To do that, hover over an action item you added, and click on the link displayed in the bottom left corner of the action item.
Completing the Agenda Meeting
When you are done discussing your topics and setting action items you can click the End meeting button to complete the Agenda Meeting.
When the meeting finishes, all participants will receive an email containing the decided action items, and the topics discussed.
With AI-Assist enabled, you will also get a summary of your retrospective in the received email as well as in the Agenda Meeting analysis on your Timeline.
Action items and integrations
The person who clicks End meeting will see an extra summary screen. This screen is available if you have an active integration that allows you to turn action items into tasks or issues in your third-party service.
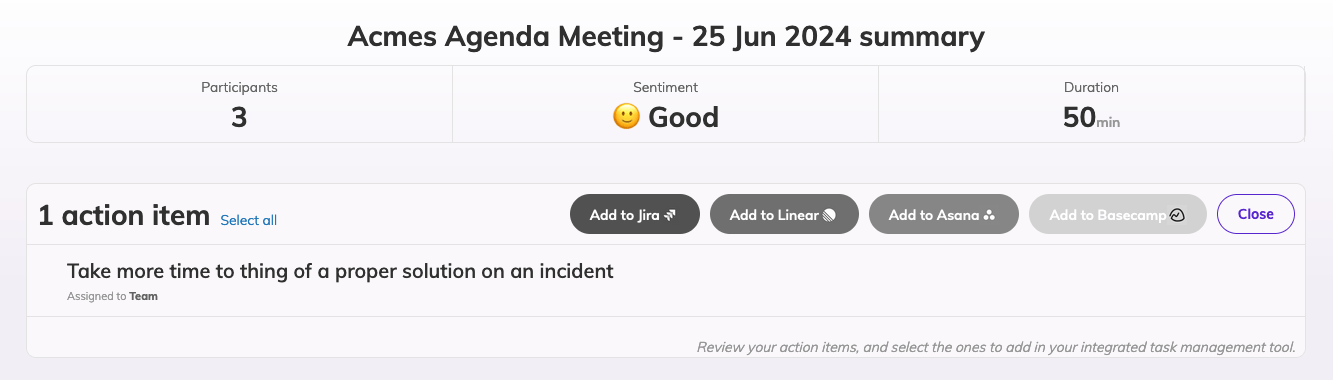
Hover over an action item and click on the checkbox at the left to select it. Then click on the respecting integration button to import selected action items to the integration of choice.
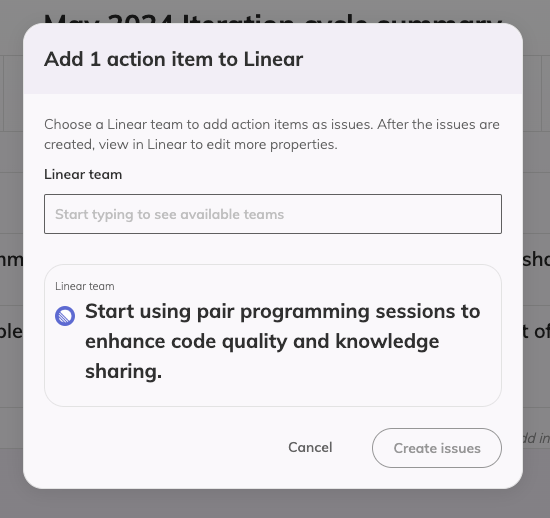
In case there is no need for an import, click the Close button, located on the right side of the action items card, to exit this view.
Additional options
Choose a preset activity
You can populate your Agenda Meeting with topics from a list of preset activities:
If you just started an empty Agenda Meeting you will see a Choose preset activity button right below the Meeting goal and above the input for adding your custom topic.
If you have already populated your meeting with custom topics, you can find the Choose preset activity option in the dropdown menu on the three dots options at the far right of the header interface.
Preset activities cover some basic use cases of the Agenda Meeting, that you can use either as a starting point for editing/adjusting your topic or use as is.
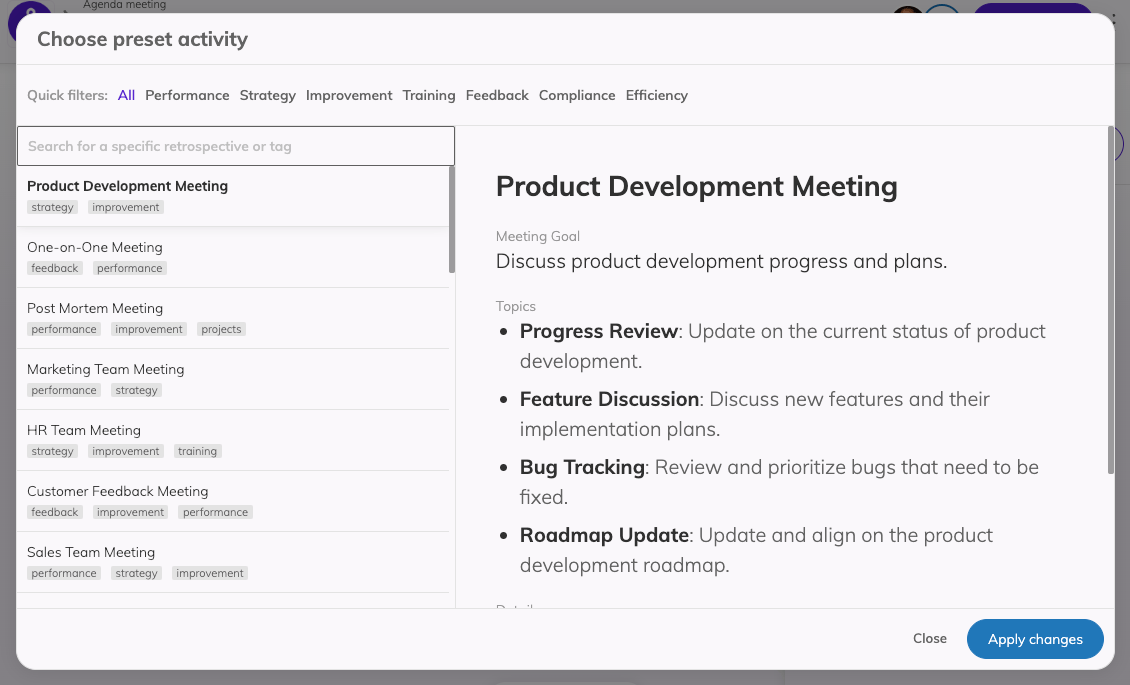
You can search the available meetings either using the quick filters on top or using the search field above the meeting presets.
When you find a meeting of interest, click on it to see more details about its meeting goal, topics, and description. Click the Apply changes button to populate your Agenda Meeting with the specific goal and topics.
Agenda meeting checklist
At the bottom of the topics list and below the input for the new topic, you will see a checklist that is updated as the meeting progresses. This is a reminder of actions that need to happen to consider an agenda meeting successful.
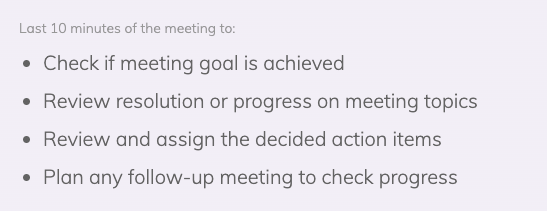
Make sure to secure time in the meeting to review the suggested bullet points.
Setting or changing video call URL
To use a video conference with your remotees you can set up a Video Call Link from the options dropdown on the left of the main button.
This input is available to all your team members and anyone can set up the Video Call URL. You can type and use any video service you are already using.
To access the setup Video Call URL use the link displayed in the middle on the bottom of the page.